How to Perform Continuous Ping on Windows, Linux and Mac

Ping, a network troubleshooting utility, allows you to test the connectivity between your computer and another device on a network. While a single ping command can provide basic information about the connection, there are scenarios where continuous ping becomes indispensable.
In this article, we will guide you through the process of performing continuous ping tests on three major operating systems: Windows, Linux, and Mac. We will explore the command-line options and parameters available in each platform, providing you with the necessary knowledge to monitor network connectivity in real time.
What is Ping?
Ping, short for “Packet Internet Groper,” serves as a valuable troubleshooting tool for assessing the accessibility of devices between two endpoints. Its primary purpose is to verify the successful transmission of data packets to their intended destinations. By employing the Internet Control Message Protocol (ICMP), Ping uses a sequence of echo messages to determine the activity status of a remote host, measure the round-trip delay in communication, and identify packet loss.
The functionality of the Ping command relies on a simple process. Initially, it sends an echo request packet to a specific address and then patiently awaits a reply. The ping operation is considered successful only if the echo request reaches its destination and the destination promptly responds with an echo reply within a designated timeframe, known as the timeout period.
Ping is a widely available utility across various platforms, including Windows, Linux, and macOS. It serves as an essential network administration tool, not only for general-purpose operating systems but also for networking platforms like Cisco, Cisco ASA, and others. Its versatile nature makes it a valuable asset in network diagnostics and troubleshooting tasks.
How to Perform Continuous Ping on Windows?
In the Windows operating system, the default behavior of the ping command involves sending four data packets to a specified target computer identified by its IP address or hostname. However, if you wish to conduct an ongoing network connection test between two computers, Windows offers the option of performing a “continuous ping.”
To run a continuous ping test on Windows 7, 8, or 10, follow these steps:
- Open the Windows command prompt. You can do this by pressing the Windows key and the ‘R’ key simultaneously, then entering the command “CMD” and clicking Enter.
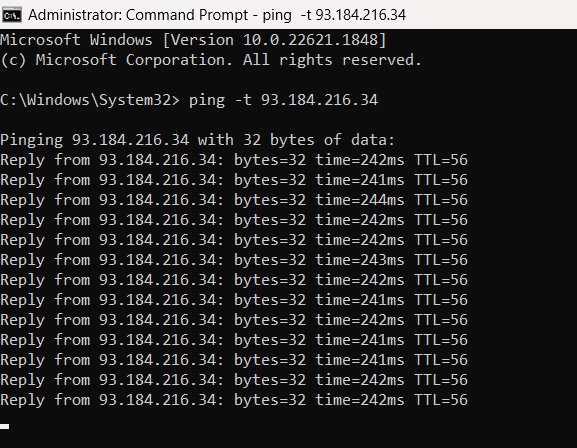
- In the command prompt, enter the command “ping” followed by the “-t” option and the desired address. Command: “ping -t 93.184.216.34“. Press Enter to confirm.
By executing the command in this manner, Windows initiates the ping operation as an uninterrupted process, continuously sending echo requests and displaying the corresponding response packets on the standard output (stdout) of the command prompt. The output includes the IP address of the pinged computer, the size of the response packet in bytes, the response time in milliseconds (ms), and the TTL (Time to Live) value.
The echo requests are sent to the target computer every second until you manually terminate the command prompt program by pressing [Ctrl] + [C].
Upon stopping the continuous ping, the program provides a statistical summary, presenting ping statistics related to the test.
If desired, you have the option to redirect the standard output to a text file. To achieve this, you can use the greater-than symbol (>) followed by the desired file name (including the extension).
Command: “ping -t 93.184.216.34 > logfile.txt“.
If the specified file does not exist, it will be automatically created. In the provided example, the standard output will be directed to a text file named “logfile.txt”.
This text file will contain both the information regarding incoming data packets and the ping statistics recorded during the test.
How to Perform Continuous Ping on Linux?

In Linux, the ping command line program is inherently designed to run in an endless loop by default, making it convenient for continuous ping tests. To perform a continuous ping test on a Linux system, follow the instructions below:
- Open the terminal for your Linux distribution. In Ubuntu, you can do this by using the key combination [Ctrl] + [Alt] + [T] (Genome, KDE).
- Enter the ping command followed by the target computer’s address in the command line and press [Enter]. In Linux, redirecting the standard output to a text file follows the same syntax as in Windows. Command: ping 93.184.216.34 > logfile.txt
- This command will continuously ping the specified IP address (93.184.216.34) and redirect the standard output to a text file named “logfile.txt”.
- If you want the continuous ping to include timestamps, you can use the ping command with the -D option. This will display a UNIX timestamp before each incoming response packet.
- If you prefer to limit the number of pings instead of running an endless loop, you can use the -c option to specify the desired quantity. Command: ping -c 4 93.184.216.34
This command will ping the target computer with the IP address 93.184.216.34 exactly four times before the program terminates itself.
By following these instructions, you can effectively perform continuous ping tests on a Linux system, capturing the output in a text file and customizing the behavior of the ping command as per your requirements.
How to Perform Continuous Ping on MacOS?

MacOS also runs the ping command line program as a continuous ping by default. To perform a continuous ping test on MacOS, follow the instructions below:
- Open the terminal. You can locate the Mac terminal under the “Applications” folder in the “Utilities” subfolder.
- Execute the ping command by providing the address of the target computer. In MacOS, the redirection of the standard output follows the same procedure as in Linux and Windows. Command: ping 93.184.216.34 > logfile.txt
This command will initiate a continuous ping to the specified IP address (93.184.216.34) and redirect the standard output to a text file named “logfile.txt”.
- To run a ping test with a specific number of echo request queries, you can use the “-c” option, similar to Linux.
- Command: ping -c 4 93.184.216.34
This command will perform four ping queries to the target computer with the IP address 93.184.216.34.
By following these instructions, you can conduct continuous ping tests on MacOS using the terminal, redirect the output to a text file, and customize the number of ping queries as per your requirements.
Conclusion
In conclusion, performing continuous ping tests on Windows, Linux, and macOS can be immensely beneficial for network troubleshooting, monitoring, and connectivity analysis. The ping command, available on these operating systems, allows you to assess the accessibility and responsiveness of remote hosts, measure round-trip delays, and identify potential packet loss.
By understanding and utilizing the continuous ping feature, you gain valuable insights into your network’s performance, diagnose issues, evaluate stability, and effectively troubleshoot connectivity problems. Whether you are an administrator, network engineer, or simply an individual looking to monitor your network, continuous ping tests provide real-time data and statistics that facilitate informed decision-making and efficient problem resolution.


