
Has the “Last Line No Longer Available” error message ever appeared on your iPhone while attempting to write a text message or email? This can be an incredibly frustrating experience, particularly when trying to send an urgent message or reply to an important email.
Thankfully, various solutions are available to resolve this issue and allow for smooth texting and emailing on your iPhone. This article will discuss some of the most successful methods for addressing the “Last Line No Longer Available” error on your iPhone. So, let’s delve into these solutions and eliminate this troublesome problem for good.
What Causes “Last Line No Longer Available” Error?
The “Last Line No Longer Available” error affects iPhones with dual-SIM capability. This error may occur if you have a standard SIM and an eSIM linked to your phone. However, it usually happens when making calls from the default SIM using the Recent Calls feature in the Phone app.
An error message will prompt you to use your remaining line instead. If you choose to call using the remaining line, be aware that it won’t use your default number.
The “Last Line No Longer Available” error first appeared on the iPhone XS and XS Max in 2018 and has affected all iPhones with dual-SIM capabilities since then, including iPhone 11, 12, 13, and 14, the 2022 iPhone SE. If you don’t use the dual-SIM functionality on your iPhone, you won’t encounter this error. However, the first and second-generation iPhone SE doesn’t have dual-SIM capabilities, so you shouldn’t have this problem with those devices.
How to Fix “Last Line No Longer Available” on iPhone?
Sometimes iPhone users see an error message that says “Last Line No Longer Available” when their phone fails to connect to the cellular network. This could happen due to a weak signal, incorrect settings, or a problem with the phone itself.
However, there are several solutions available to fix this issue:
1. Update Your iPhone
Keeping your iPhone updated to the latest software version can help prevent various issues, including the “Last Line No Longer Available” error. To update your iPhone, follow these steps:
- Connect your iPhone to a Wi-Fi network.
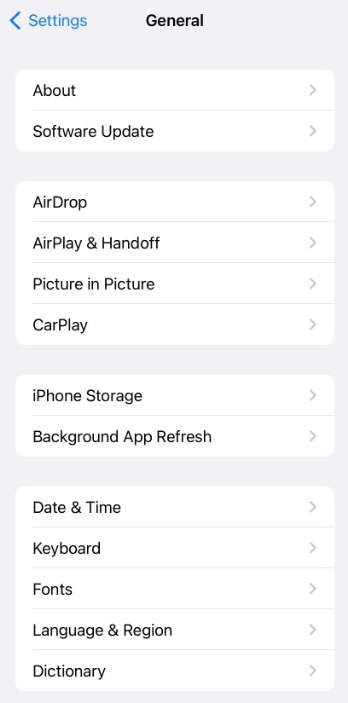
- Go to Settings > General > Software Update.
- If an update is available, tap “Download and Install.”
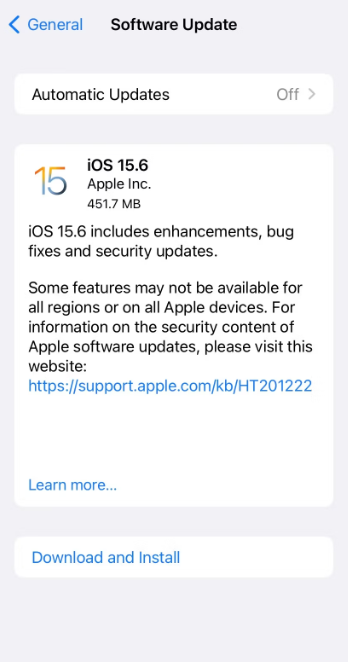
- Enter your passcode if prompted.
- Agree to the terms and conditions, then wait for the update to download and install.
2. Manually Change the Phone Line
When you encounter the “Last Line No Longer Available” error on your iPhone, you’ll see two options: Call or Cancel. First, try pressing Call to switch to your other phone line. This may fix the error, but you’ll need to switch to the other line manually if it doesn’t.
There are two ways to do this. First, when you dial a number, tap the option at the top of your screen and select the other line. Or, if you dial from Contacts, select the Preferred Line option next to the person’s name to choose a specific sequence to call them with.
3. Eject SIM Cards Before Dialling
Another solution you can try if you still encounter the “Last Line No Longer Available” error on your iPhone is to eject your SIM cards before dialing. Here’s how to do it:
- Turn off your iPhone by pressing and holding the power button until the “slide to power off” option appears, then slide to turn off your phone.
- Use a SIM ejector tool or a paperclip to remove both SIM cards from your iPhone.
- Wait for a few seconds and reinsert both SIM cards back into your iPhone.
- Turn on your iPhone and wait for it to connect to the cellular network.
- Open the Phone app on your iPhone and try redialing the number.
4. Limit Cellular Data to Your Secondary Line
If you’re still encountering the error while using a secondary line, limiting your cellular data usage to your secondary line may help resolve the issue. Here’s how to do it:
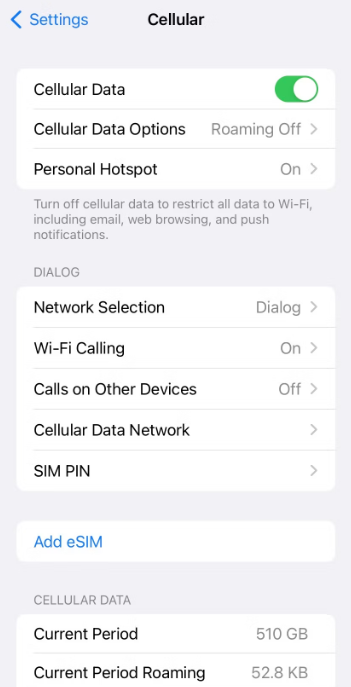
- Open the Settings app on your iPhone.
- Tap on Cellular.
- Scroll down to find the Cellular Data section.
- Tap on Cellular Data and choose your primary line.
- Go back to the Cellular settings page.
- Scroll down to the Cellular Plans section.
- Tap on the secondary line.
- Toggle off the switch next to “Allow Cellular Data Switching.”
Following these steps will limit cellular data usage to your primary line and potentially resolve the “Last Line No Longer Available” issue.
5. Turn off Wifi Calling
If you’re experiencing the “Last Line No Longer Available” error on your iPhone, it could be due to a conflict caused by using the WiFi Calling feature. Disabling this feature may help resolve the issue. Here’s how to do it:
- Open the Settings app on your iPhone.
- Tap on “Mobile Data”. Note: On older versions of iOS, this may be labeled as “Cellular”.
- Scroll down and tap on “Wi-Fi Calling”.
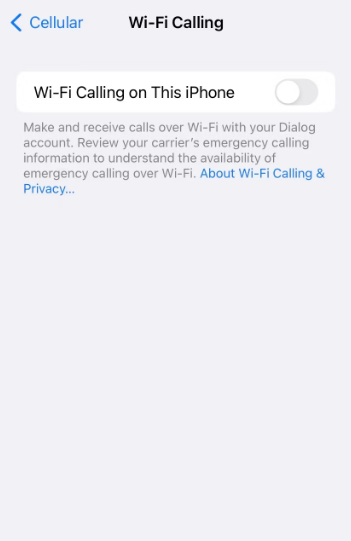
- Make sure that the switch next to “Wi-Fi Calling on This iPhone” is turned off.
By disabling WiFi Calling, you can avoid conflicts with your cellular data connection and potentially prevent the “Last Line No Longer Available” error from occurring.
6. Clear Recent Call Logs
If you still have the “Last Line No Longer Available” error, it may be caused by an issue with contacts in your recent call logs. You’ll need to clear out your call logs to resolve the issue. Follow these steps to do so:
- Open the Phone app on your iPhone.
- Tap “Recents” at the bottom of the screen.
- Tap on “Edit” in the top-right corner of the screen.
- Tap on “Clear” in the top-left corner of the screen.
- Finally, tap on “Clear All Recents.”
- Try making a phone call again to see if the issue is resolved.
Clearing your call logs will remove all recent call history from your iPhone. If you prefer to keep this data, you can skip this method and try one of the other fixes mentioned earlier.
7. Reset Network Settings
You may need to reset your network settings if you’re still experiencing the “Last Line No Longer Available” error on your iPhone. Here’s how:
- Open the Settings app on your iPhone.
- Tap on “General” and then scroll down to “Reset.”
- Tap on “Reset Network Settings.”
- You may be prompted to enter your passcode.
- Tap on “Reset Network Settings” to confirm.
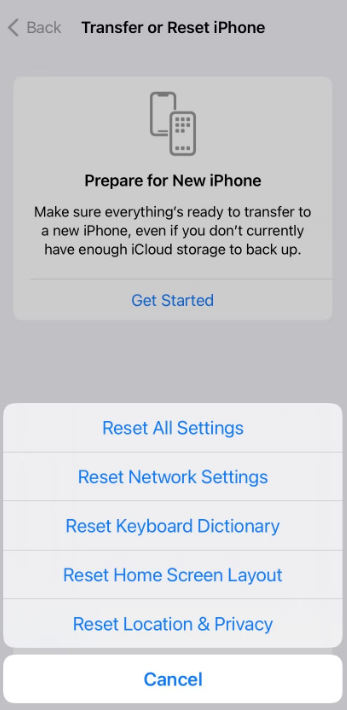
- Your iPhone will restart automatically.
- Once your iPhone has restarted, try making a phone call again to see if the issue is resolved.
Remember that resetting your network settings will erase all saved Wi-Fi passwords and VPN settings, so you must re-enter them manually. It’s also worth noting that this fix may not work for everyone, so if the issue persists, you may need to contact Apple Support for further assistance.
8. Disable Automatic Network Selection
The network selection setting on your iPhone can cause the “Last Line No Longer Available” error. When set to automatic, the phone tries to select the network with good signal strength, which can cause issues with eSIM or Dual-SIM iPhones. Disabling the Automatic Network Selection option should fix the error.
- Open the Settings app on your iPhone.
- Tap on “Mobile Data” or “Cellular,” depending on your iPhone’s language settings.
- Scroll down and tap on “Mobile Data Options.”
- Turn off the toggle for “Automatic.”
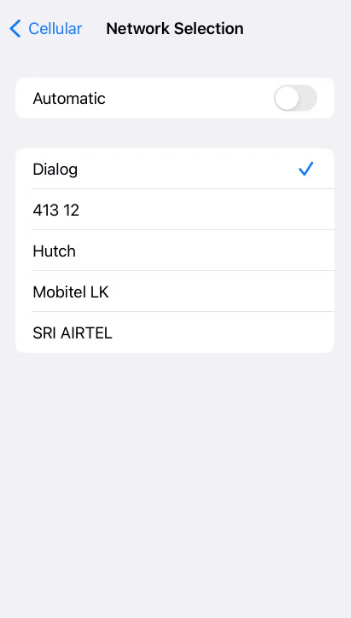
- A list of available networks will appear. Tap on the network you want to use and then exit the settings app.
- Try making a phone call again to see if the issue is resolved.
Remember that disabling automatic network selection means your iPhone won’t automatically switch to the most robust available network so you may experience slower data speeds or reduced network coverage in some areas. However, this fix may help resolve your iPhone’s “Last Line No Longer Available” error.
Conclusion
To fix your iPhone’s “Last Line No Longer Available” error, try basic troubleshooting methods like toggling Airplane Mode, restarting your phone, or clearing your recent call list. If the issue persists, you can try the other fixes mentioned above. If none work, you may need to contact your carrier or Apple Support for further assistance.